PLANT PROBLEMS
Philodendron Micans Yellow Leaves
Causes and what to do
In this guide
Yellow leaves on a philodendron micans can come from excess moisture, drying out, unsuitable light, pests, or other stress. An occasional older leaf can also yellow as it ages. Leaf color alone will not tell you which problem to fix.
Start with the potting mix and the pattern of yellowing. A plant drooping in wet soil needs a different response from one drooping in a very dry pot. The checks below help you choose what to do next.
Check the pattern before changing care
Take a photograph of the whole plant before removing leaves. Then check these details:
- Which leaves are changing? Look for a single older leaf, several leaves along a vine, or yellowing on new growth.
- How does the mix feel? Check below the surface and compare the pot with how heavy it feels after watering.
- What else is visible? Look for drooping, dry edges, soft stems, spots, or signs of pests beneath the leaves.
- What changed recently? Note a repot, a new window, a cold trip home, a missed watering, or a fertilizer application.
If one older leaf is fading while the rest of the plant looks healthy, natural aging is a reasonable possibility. Keep watching the plant. Several leaves changing together, persistent wilting, or soft stems are reasons to investigate further.
Match the symptoms with the next check
Use this table to narrow the possibilities. The combinations are clues to investigate, rather than a diagnosis from a photograph.
| What you notice | Possible explanation | What to check next |
|---|---|---|
| One older leaf yellows; the rest looks healthy | Normal leaf aging may be involved | Watch for more affected leaves or other changes. |
| Several yellow leaves; mix stays wet | Excess moisture or damaged roots | Check drainage and root condition if decline continues. |
| Yellowing with curling or dry edges; pot feels light | The root ball may have dried too far | Confirm dryness and check whether water soaks into the mix. |
| Pale foliage and long gaps between leaves | Insufficient light may contribute | Assess the light reaching the plant and its newest growth. |
| Pale or scorched areas on sun-facing leaves | Too much direct light or a sudden increase | Review exposure and any recent move. |
| Fine pale specks, webbing, or visible insects | Pest feeding may be involved | Inspect leaf undersides and stem joints closely. |
| Yellowing after repotting or a cold move | Changed conditions or root disturbance may contribute | Review the timing, mix moisture, and whether the decline is spreading. |
Check watering and drainage first
If the potting mix is still wet
Repeatedly watering before the mix has had time to dry can reduce the air available to roots. Damaged roots struggle to supply the leaves with water, so an overwatered plant can wilt as well as yellow. Adding more water because the leaves droop can make the problem worse.
Empty standing water from the saucer or outer pot. Make sure the inner container has drainage holes and water can leave it. Consider whether the pot is much larger than its root ball or the mix has become compacted. Correcting those conditions matters as much as changing the watering interval.
Check moisture before the next watering instead of following a fixed calendar. If yellowing spreads while the mix remains wet, or stems become soft, inspect the roots rather than waiting for the surface alone to dry.
If the mix is unusually dry
Prolonged dryness can also cause yellowing, curling, and leaf loss. A very light pot and dry mix support that possibility. Water slowly and thoroughly until excess runs from the drainage holes, then let the pot drain and empty the saucer.
If the mix has pulled away from the pot sides, water may run through the gap without wetting the root ball. Apply water gradually and check that the mix actually absorbs it. Rehydrating a very dry mix may take more than one application.
Afterward, learn how the pot feels as it dries. Check the upper mix and pot weight together. Room conditions and the container affect when watering is needed, so a routine that worked last month may need adjusting.
Use our Philodendron Micans care guide to review the everyday light and watering checks.
Know when to inspect the roots
Inspect roots when spreading yellowing comes with persistent wetness, ongoing wilting, or soft stems. Support the plant and gently ease the root ball out of the pot. Look at texture as well as color: firm roots are a better sign than roots that are soft, mushy, or shedding their outer layer.
The University of Maryland Extension’s root-rot guide explains why plants with damaged roots may wilt even when the potting mix contains enough moisture. A wet pot and yellow leaves are a reason to check; they do not identify a particular pathogen.
What you find determines the next step:
- If roots are mostly firm, correct the drainage and watering conditions. Repot only if the container or mix is contributing to the problem.
- If some roots are clearly rotten, remove the damaged portions with clean tools and retain healthy tissue. Replant in fresh, well-drained houseplant mix in a clean pot that fits the remaining root ball.
- If most roots or the stem base are rotting, the plant may not be salvageable. Keep it separate from healthy plants; take cuttings only from healthy tissue if suitable stems remain.
Avoid moving a damaged root system into an oversized pot. A larger volume of mix can stay wet longer and recreate the same problem.
If the mix or container needs changing, read about philodendron potting soil and how to repot a philodendron.
Review light and recent changes
Inadequate light can contribute to pale foliage and increasingly long spaces between leaves. Assess the light at the plant itself. A room that looks bright from the doorway may provide much less light on a shelf behind a curtain or far from the window.
Strong direct sun can bleach or scorch leaves, especially after a sudden move to brighter conditions. If exposed leaves are affected, filter the sunlight or choose a position with bright, indirect light. Increase exposure gradually when moving a plant from a dim spot.
A recent repot, a change in light intensity, or a cold draft can also help explain when symptoms began. Keep Micans away from cold windows and blasts from heating or cooling vents. Match any change in position with a fresh check of how quickly the mix dries.
Recent changes are useful clues, but they do not prove the plant is simply adjusting. Soft stems, worsening wilt, or continued yellowing in wet mix still need attention.
Look beneath leaves for pests
Inspect the undersides of leaves and the points where leaves join the stems. Fine pale speckling with webbing can suggest spider mites. White cottony clusters may be mealybugs. Raised bumps may be scale insects. Look for the pest itself before choosing a treatment.
Separate a plant with a confirmed infestation from your other houseplants. Some pests can be reduced by washing affected foliage with water. If a pesticide is needed, choose a product labeled for the identified pest, the plant, and indoor use. Follow its directions and continue checking afterward.
An unexplained yellow leaf is not enough evidence to select an insect treatment. If you cannot identify what you are seeing, take clear close-up photographs and ask your local Extension service for help.
Review feeding after the basic checks
Pale foliage and weak growth can occur when a plant lacks nutrients, but root trouble, light, and pests can produce similar symptoms. Review the plant’s feeding history after checking those conditions. If it is actively growing and needs feeding, use a houseplant fertilizer according to the label.
More fertilizer can also create problems. Excess salts may damage roots and cause yellowing or browning; a crust on the mix or pot is one clue to investigate. If excess feeding is plausible, stop adding fertilizer and assess the mix and drainage. Flushing salts requires a pot that drains freely.
Reduce or pause feeding when growth slows in dim winter conditions. Fertilizer is not a substitute for repairing a watering or root problem.
Decide whether to remove yellow leaves
Remove leaves that are completely yellow, shriveled, or brown with clean, sharp pruners. Keep leaves that are still predominantly green unless disease or another clear reason calls for removal. Removing too much useful foliage can slow recovery.
Take any photographs you need before pruning, then record which leaves you removed. Wear gloves when handling philodendrons because their sap can irritate skin. Keep cut leaves and cuttings away from children and pets.
Pruning changes the appearance of the plant. The cause of yellowing still needs correcting.
Watch what happens after a change
Record the date, how the mix felt, and what you adjusted. Take another photograph from the same angle when you next check the plant. Compare the number of affected leaves and the condition of the newest growth.
A useful improvement is that fewer leaves become affected and subsequent growth develops normally. Damaged foliage may remain discolored, so do not judge the whole plant by whether an old yellow leaf becomes green. Severely damaged or dying leaves may not recover.
Keep monitoring moisture before watering. If yellowing continues to spread, revisit the roots, light, and pest inspection instead of repeating the same adjustment. A severely declining plant with soft stems or collapsing roots needs prompt assessment, rather than a promised recovery deadline.
For uncertain or extensive damage, share the whole-plant photograph, leaf close-ups, recent care changes, and root observations with a local Extension service. That history makes it easier to assess the plant than a single leaf photograph alone.
If the yellowing comes with localized marks, our Micans brown spots guide helps you describe that damage separately.
These guides help you assess care conditions. If a problem keeps spreading, share your observations and photographs with a local Extension service. Read our editorial approach.
Spotted something we should check?
Suggest a correctionA USEFUL NEXT READ
Keep following the clues.
Plant care8 min read
Philodendron Micans Care
Light, water, and a better everyday routine for velvet leaves.
Read the guide Image credits
Plant problems8 min read
Philodendron Micans Brown Spots
Use the texture and pattern of a mark to decide what to check.
Read the guide Image credits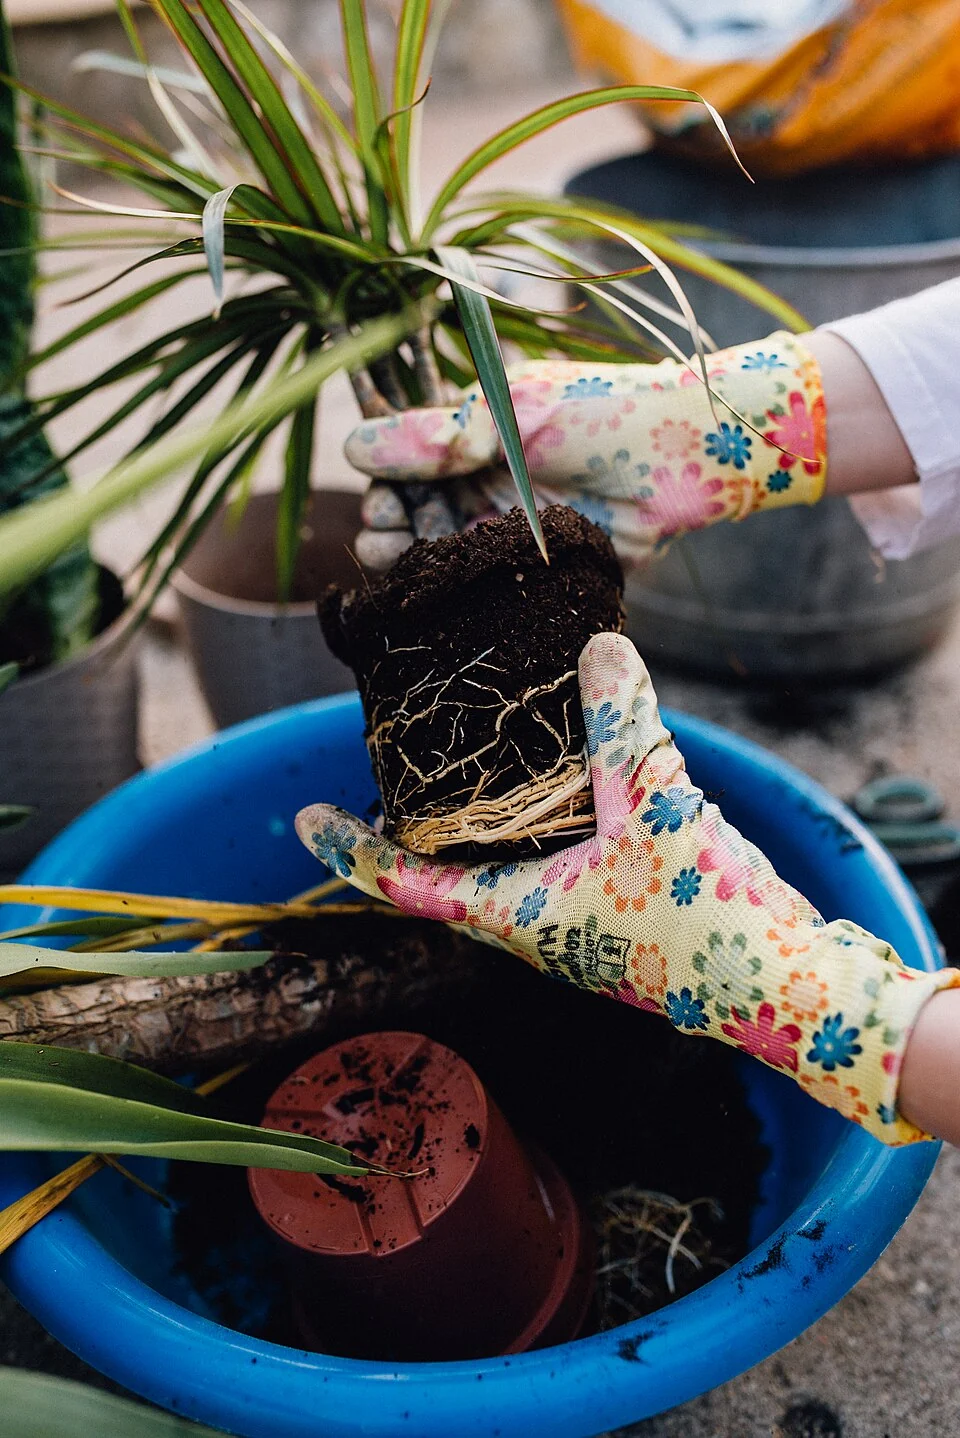
Soil & repotting8 min read
How to Repot a Philodendron Plant
Know when a move is needed, and how to handle the root ball.
Read the guide Image credits